ShopDreamUp AI ArtDreamUp
Deviation Actions


Description
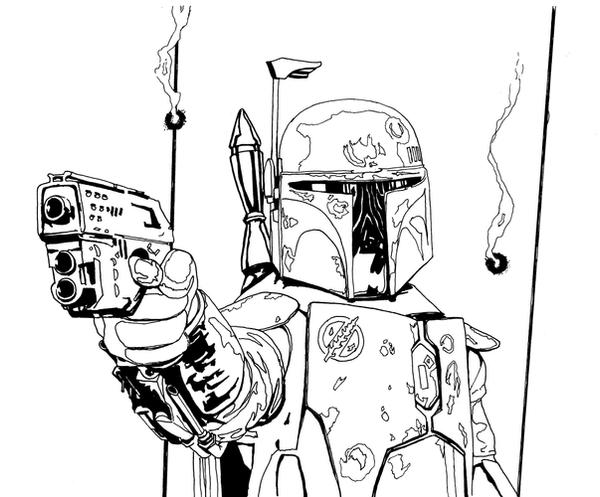
It's a bad day to be a smuggler ...
Here's the linework for a Boba Fett piece I'm working on. I admit to shamelessly stealing the pose, costuming and weapon details off a kids costume party website. The costume they had wasn't the greatest, but it wasn't bad either.
I went a little nuts detailing the dings, nicks and reflections on the armor and faceplate - I think I started channelling Tim Bradstreet after awhile there.
This is one of those pieces that I wish I had saved some of the intermittent stages for a WIP tutorial. My process is pretty basic:
1) rough sketch - I do this one of two ways: either I just draw the whole thing in thick, dark pencil (I usually use a Stabilo carpentry pencil, which leaves a thick, dark blue, charcoal-like line) or I draw in non-repro blue pencil. If I use a dark pencil to start, I'll photocopy the image on heavyweight bristol in non-repro blue.
2) refining drawing - starting with my blue-line drawing, I'll lay in the details as cleanly as I can, refining as I go. Depending on how sure I was of my initial sketch, I may have to do this stage twice.
3) Final lines - I always produce one final line drawing in pencil before I go to inks, even though this seems redundant. The reason (leaving out boring details) is that my hands shake, sometimes badly (which is one reason I don't attempt to be a photographer anymore), so that getting a clean ink line is a long and tedious (and sometimes futile) process for me. With pencil I can use a sketchy line to "train" my hand to lay down the line I want, while inks are a one-shot hit or miss process.
I'll be working on the colors for this one tonight - you might just see the colors later (Wink)")
Here's the linework for a Boba Fett piece I'm working on. I admit to shamelessly stealing the pose, costuming and weapon details off a kids costume party website. The costume they had wasn't the greatest, but it wasn't bad either.
I went a little nuts detailing the dings, nicks and reflections on the armor and faceplate - I think I started channelling Tim Bradstreet after awhile there.
This is one of those pieces that I wish I had saved some of the intermittent stages for a WIP tutorial. My process is pretty basic:
1) rough sketch - I do this one of two ways: either I just draw the whole thing in thick, dark pencil (I usually use a Stabilo carpentry pencil, which leaves a thick, dark blue, charcoal-like line) or I draw in non-repro blue pencil. If I use a dark pencil to start, I'll photocopy the image on heavyweight bristol in non-repro blue.
2) refining drawing - starting with my blue-line drawing, I'll lay in the details as cleanly as I can, refining as I go. Depending on how sure I was of my initial sketch, I may have to do this stage twice.
3) Final lines - I always produce one final line drawing in pencil before I go to inks, even though this seems redundant. The reason (leaving out boring details) is that my hands shake, sometimes badly (which is one reason I don't attempt to be a photographer anymore), so that getting a clean ink line is a long and tedious (and sometimes futile) process for me. With pencil I can use a sketchy line to "train" my hand to lay down the line I want, while inks are a one-shot hit or miss process.
I'll be working on the colors for this one tonight - you might just see the colors later
Image size
6139x5079px 3.82 MB
© 2008 - 2024 r6artist
Comments15
Join the community to add your comment. Already a deviant? Log In
Sick!